From past experience of doing close-up and effects work, the last thing I wanted to use were regular tripod legs on triangles. Our animators said that some animation studios were still using tripods.
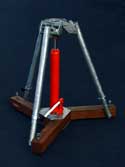
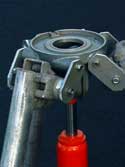
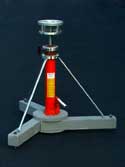
When we first set up the studio to do Gumby commercials, I borrowed back an old Fearless dolly from Tom Baron. The Fearless was too large and impractical so I build various camera support stands out of Harbor Freight flat bottom 2 ft. lift hydraulic jacks. I used the 3-ton models with 3 extension legs and the 8-ton model with only a vibration-dampening clamp (from Mc Masters) to keep the shaft from turning. These jacks can sometimes leak a little and the column should be clamped.
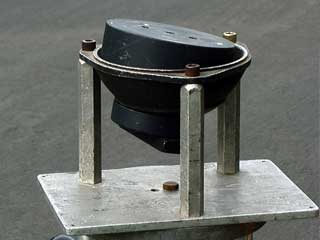
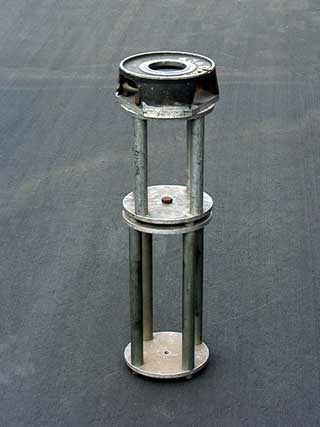
3-ton jack and 8-ton jack
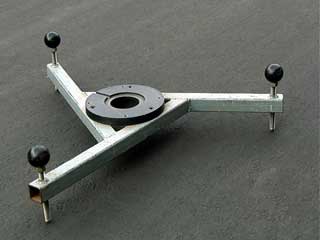
The jacks can be used as turntables. An arm attached to the vibration-dampening clamp on the column can provide a calibrated animation pan move. I used various ways to attach tripod heads, small dollies and rigs to the 8 ton models which have a solid steel column over 1 inch in diameter. Sometimes if the jack was fully extended we braced the tripod head to the base with telescoping EMT conduit for rigidity. A metal lathe is crucial for this kind of project. You might have an outside machine shop do things like fit a piece of metal to the top of the jack's riser column. The riser column can rust if wet or stored extended. Collapse the riser column to avoid rusting when stored. We also build a "T" shaped base like the no-trip grip stand bases for closer access to animation tables.
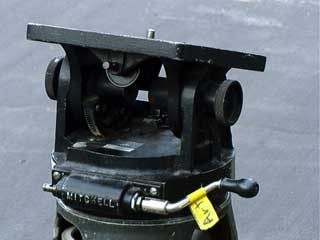
"Mitchell Gear Head" 151 on (Desk Top)
I had a small Mitchell gear head (about 8 inches square) and we bought another from Ken Stone for $1000. (These heads are quite old and not the Worrall, Moy, Arri or Mitchell gear heads designed for heavier sync sound cameras.) (The cranks on these heads are not the same as on all the other gear heads. They are not useful for practice.) I also had a lot of Mitchell free heads left from the studio. The free heads worked fine for static shots. Camera jacks made out of cable turnbuckles cut in half are helpful for fine adjusting and positive locking off a free head. You might consider a log pan handle that could be animated in increments. Sandwich a piece of plywood between the head and the tripod or stand and attach bars to calibrate moves against. Any of the old large video cradle heads could be used too.
If you have a one of these small Mitchell gear head mentioned above that has play between the gears, there are shims in the pan and tilt gears that can be removed to tighten the worm gear clearances. To gain access to the tilt gears, the large nut on the bottom of the Mitchell gear head can be removed counter-clockwise like a right hand thread. Make a large spanner to do it. I replaced the non-standard factory bolt on the bottom of the heads with a 3/8-16 Helicoils. You will need a 1/2" thick donut spacer to attach these heads to many tripod and riser tops. We also bought back my old Worrall Gear Head from Tom Baron. We didn't use it much on this project, but hope to in the future when we get into motion control. They are valuable for nodal head tilt and pan moves.
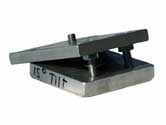
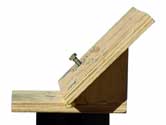
15 and 45 degree tilt plates
I built a fixed angle 15-degree tilt plate out of aluminum and a 45-degree and a 60-degree tilt plates out of quality plywood. These were very handy for high down shots and also to move the center of gravity of the camera closer to the center of the tripod head making it easier to adjust the tilt of the camera and to limit strain on the head.
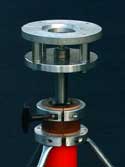
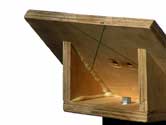
Dexter Hi Hat Leveling Ball
We used a lot of compact hi hat 150 mm ball cups from my hi hat production. They made adjustments on small dollies and rigs easy when a tripod head was too tall and heavy. They are available from Seno at modernstudioequipment.com. Seno also makes various camera leveling rigs and great grip and rigging stuff.
Steel Leg Hi Hat
One day we needed a low angle shot lower than my 30-inch high hydraulic jack stands would go. I had a steel leg hi hat, but with risers we had few choices of camera height. Zaron pointed to the drill press column. Ah hah. We bought a $175. drill press from Harbor Freight for a great low angle stand and spare drill press head. We bolted 2"x 4"s on TOP of the metal base in a triangle pattern to extend the base size and still keep the profile as low as possible. I had a right angle 150 mm ball bracket that provided camera positioning. The removed drill table was designed to tilt and gave us any angle that we needed. We added sand bags to keep it stable. When the camera was near the top of the column we added EMT conduit braces to the tripod head for stiffness.
I found some very strong and compact gearboxes with 610 to 1 ratios and 12-volt motors. They became gear heads for Crank Dollies and crank pan or tilt heads. Mounting them took some trial and error, but was well worth the effort. I wish I had them earlier in the show. They were incredibly cheaper than gear heads and worked well for various tasks. For a live action pans at 1 frame per second (72 RPM) I used two 25-1 gear boxes in tandem and the 12-volt motor at about 5 volts to get a smooth very slow 1/12 RPM 30 degree nodal pan of avalanche debris, with no animated action. It is necessary for the lens to be mounted nodal to avoid shift in the elements of the set.
Be careful when using Mitchell risers and heads with Mitchell nuts. The large aluminum threads can get banged and the nuts will become difficult or impossible to get on. Each nut should remain on each riser or head that it fits when not in use to protect the threads from dents. If the threads are tight, they can be loosened with course auto valve grinding compound and / or a triangular file. Work the nut on and off where it is tight with a little oil and valve grinding compound. When the nut goes on freely, clean the threads well and keep that nut always with that riser. I made a few 2-3/4" ID spacers to use when a nut didn't want to thread on all the way. Avoid putting an aluminum nut on an aluminum thread. It may gall / freeze.
You might consider welding the pipes to the plates and avoiding some of the machine work. Make sure you have done all your drilling, turning and tapping before welding. I tap the top disk 1/2"-13 in the center and drill the bottom disk 1/2." Add extra /38-16 tapped holes to attach braces and accessories. An adapter washer 1/2" thick about 3" in diameter with 1/2-13 thread will attach a homemade riser to the top of a regular Mitchell riser. Industrial Metals has large disks. 818-729-3333
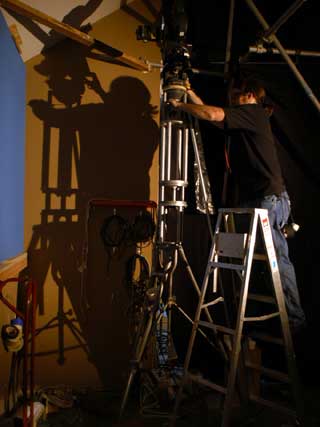
Braced TV Legs with Risers
We often made down shots from about 8 or more feet in the air. We stacked risers on top of an old set of TV BRACED aluminum legs. There are a few of these left around, but are getting very expensive. If you need to do a lot of high angle shots consider building a tower of wood and plywood with a Mitchell riser plate on the top. If it is straight up and down in front it could taper to the back. Provide a floor for sand bags. Consider a place to stand while setting up a shot and a way to haul a heavy camera up. Make a 60-degree tilt plate suggested above to make it easier to tilt the camera. Paint it if it has to live outside.